Your Cart is Empty
Best Studio Monitors for Home Recording


When you’re on the hunt for the best studio monitors for home recording, the goal isn’t to find speakers that sound good. It’s about finding speakers that sound true. The best options out there always prioritise a flat, accurate frequency response, making sure your mixes translate properly everywhere else.
Ultimately, the right monitor is brutally honest—it shines a spotlight on all the flaws in your mix so you can actually fix them.
Your Guide to Choosing Home Studio Monitors
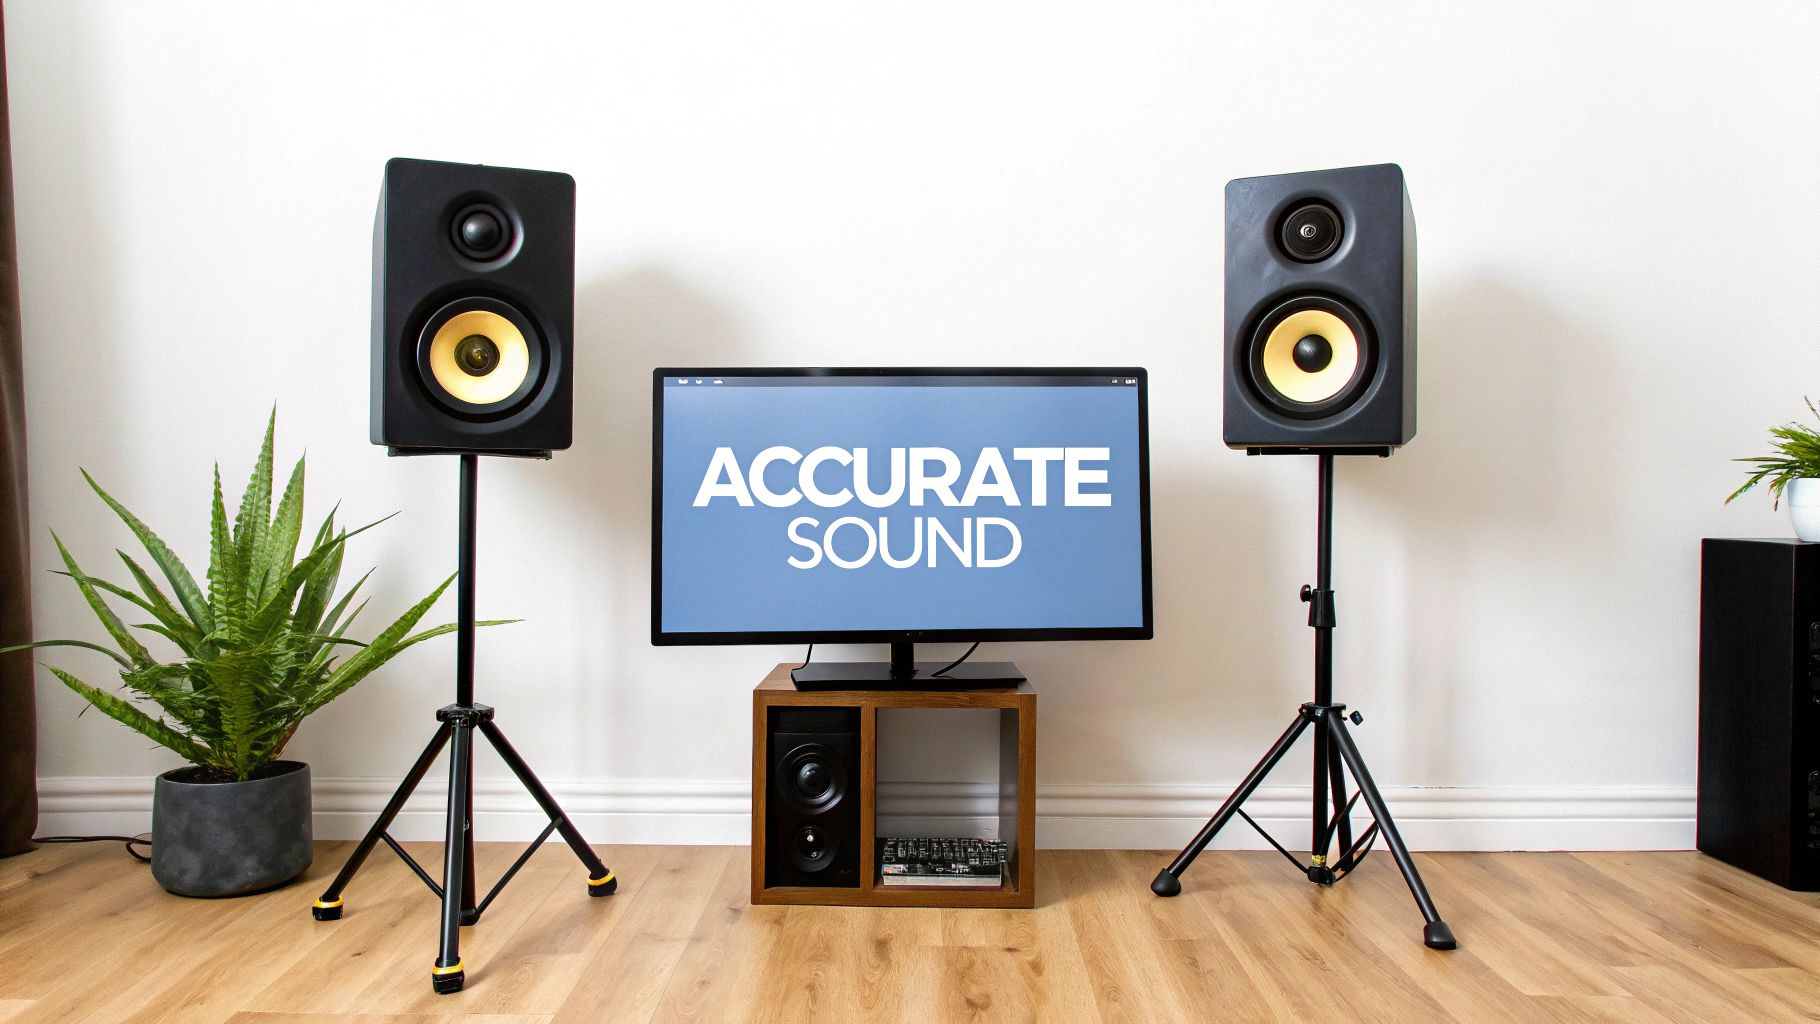
Welcome to the definitive guide on picking out the perfect studio monitors for your home setup. If you've ever spent hours on a mix that sounds incredible in your room, only to have it fall apart in the car or on a pair of earbuds, your speakers are probably the culprit.
Consumer hi-fi speakers are designed to flatter music. They often boost certain frequencies to create a listening experience that’s exciting but, frankly, dishonest. Studio monitors do the complete opposite; they’re an uncoloured window into your audio. They are engineered from the ground up for accuracy, giving you an unfiltered playback of your recording. This honesty is the single most important tool you have for making mixing decisions you can trust.
Understanding the Core Principles
Before we get bogged down in technical specs, it’s vital to grasp what separates professional monitors from your everyday speakers. Think of it this way: a regular speaker is like an Instagram filter—it’s designed to make everything look and sound better. A studio monitor is like a high-resolution, unedited photo, showing you every single detail, good or bad.
To get you started on the right foot, here are the key things we'll be breaking down in this guide:
- Frequency Response: This is all about how accurately a monitor can reproduce audio frequencies without adding its own sonic “flavour.”
- Driver Size: We’ll look at how the woofer size (like a 5-inch vs. an 8-inch) impacts bass and whether it’s the right fit for your space.
- Room Acoustics: Your room is just as crucial as your monitors. We'll explore why and how to get them to work together.
- Connectivity: Getting your head around the different inputs (like XLR and TRS) and how to connect everything properly.
Thinking about these factors will help you see past the brand names and focus on what really makes a difference for your mixes. For a deeper dive, check out our detailed guide on choosing the right studio monitors.
The Growing Demand for Quality Sound
The need for reliable, accurate monitors has absolutely exploded with the rise of home studios. Here in Australia, this trend is part of a much bigger picture. As of 2025, Australia holds about 6.21% of the Asia Pacific studio monitors market, a region that’s expected to hit USD $11.034 billion by 2033.
This massive growth is fuelled by musicians, podcasters, and creators all chasing professional-grade sound, turning what was once a niche product into a home studio essential. You can learn more about these studio monitors market trends to see just how big this movement has become.
Why Accurate Sound Is Crucial for Your Mixes
When you start digging into the best studio monitors for home recording, you'll keep bumping into a term that sounds way more technical than it is: flat frequency response. Don't let the jargon put you off. It’s the single most important quality a monitor needs to be genuinely useful for mixing.
Think of it this way. Your average hi-fi or Bluetooth speaker is like wearing sunglasses. They’re designed to make the world look a bit warmer, more vibrant, and generally more pleasing. They add a flattering tint to reality. That’s great for kicking back and enjoying music, but it’s an absolute disaster when you’re trying to make critical mixing decisions.
A studio monitor, in contrast, is like a perfectly clean, clear pane of glass. It doesn’t add any colour or character. It just shows you what’s actually there—all the good, the bad, and the ugly. This brutal honesty is exactly what you need. The goal isn’t to buy a monitor that sounds ‘good’; it’s to buy one that sounds ‘true’.
The Translation Problem Explained
The whole point of mixing is to make a track that sounds fantastic everywhere, on every possible device. This is what we call translation. Will your mix hold up in a car with a booming subwoofer? What about on a tinny pair of laptop speakers or through expensive audiophile headphones?
If you mix on speakers that hype up the bass, you’ll naturally turn the bass down in your track to compensate. In your room, it sounds perfect. But the moment you play it anywhere else, your mix will sound thin, weak, and lifeless. The opposite is just as bad. If your speakers have no low-end, you'll crank the bass to make it feel right, only to create a muddy, boomy mess on any other system.
A mix that only sounds good in one place is a failed mix. Accurate monitors are your insurance policy against this, giving you a neutral reference point that helps your work translate consistently to the outside world.
Hearing the Flaws Is the Point
A truly accurate monitor hides nothing. It shines a spotlight on every subtle flaw you need to fix to get a professional-sounding track, exposing problems you would completely miss on consumer speakers.
Here are just a few of the things an honest monitor lets you hear:
- Excessive Sibilance: That harsh "sss" sound in a vocal track becomes painfully obvious, letting you know it's time to reach for a de-esser.
- Muddiness in the Low-Mids: That notorious 200-500 Hz range can easily get cluttered and make a mix feel crowded. Accurate monitors help you pinpoint these problem frequencies and carve them out.
- Phase Incoherence: When stereo elements are out of phase, they can cancel each other out and sound weak, especially in mono. A true monitor helps you catch these subtle but critical issues before they ruin your track.
- Reverb and Delay Tails: You can hear exactly how long your effects are lingering and whether they’re cluttering up the mix or sitting perfectly in their own space.
The Real-World Test
Picture this: you’ve just spent hours crafting a mix on your hi-fi speakers. The kick drum is punchy, the vocals are crisp, and it all sounds massive. You excitedly run out to your car for the classic "car test," and suddenly, the bass is a rattling, overwhelming boom, and the vocals have all but disappeared.
That’s the classic symptom of mixing on coloured speakers. Your hi-fi system probably had a "scooped" sound profile—boosted bass and treble, with a cut midrange. You unknowingly created a mix that perfectly counteracted that specific curve, so on any other system, it just falls apart.
The best studio monitors for home recording are designed to prevent this exact scenario. They give you a neutral, trustworthy starting point, ensuring your creative decisions are based on sonic reality, not deception.
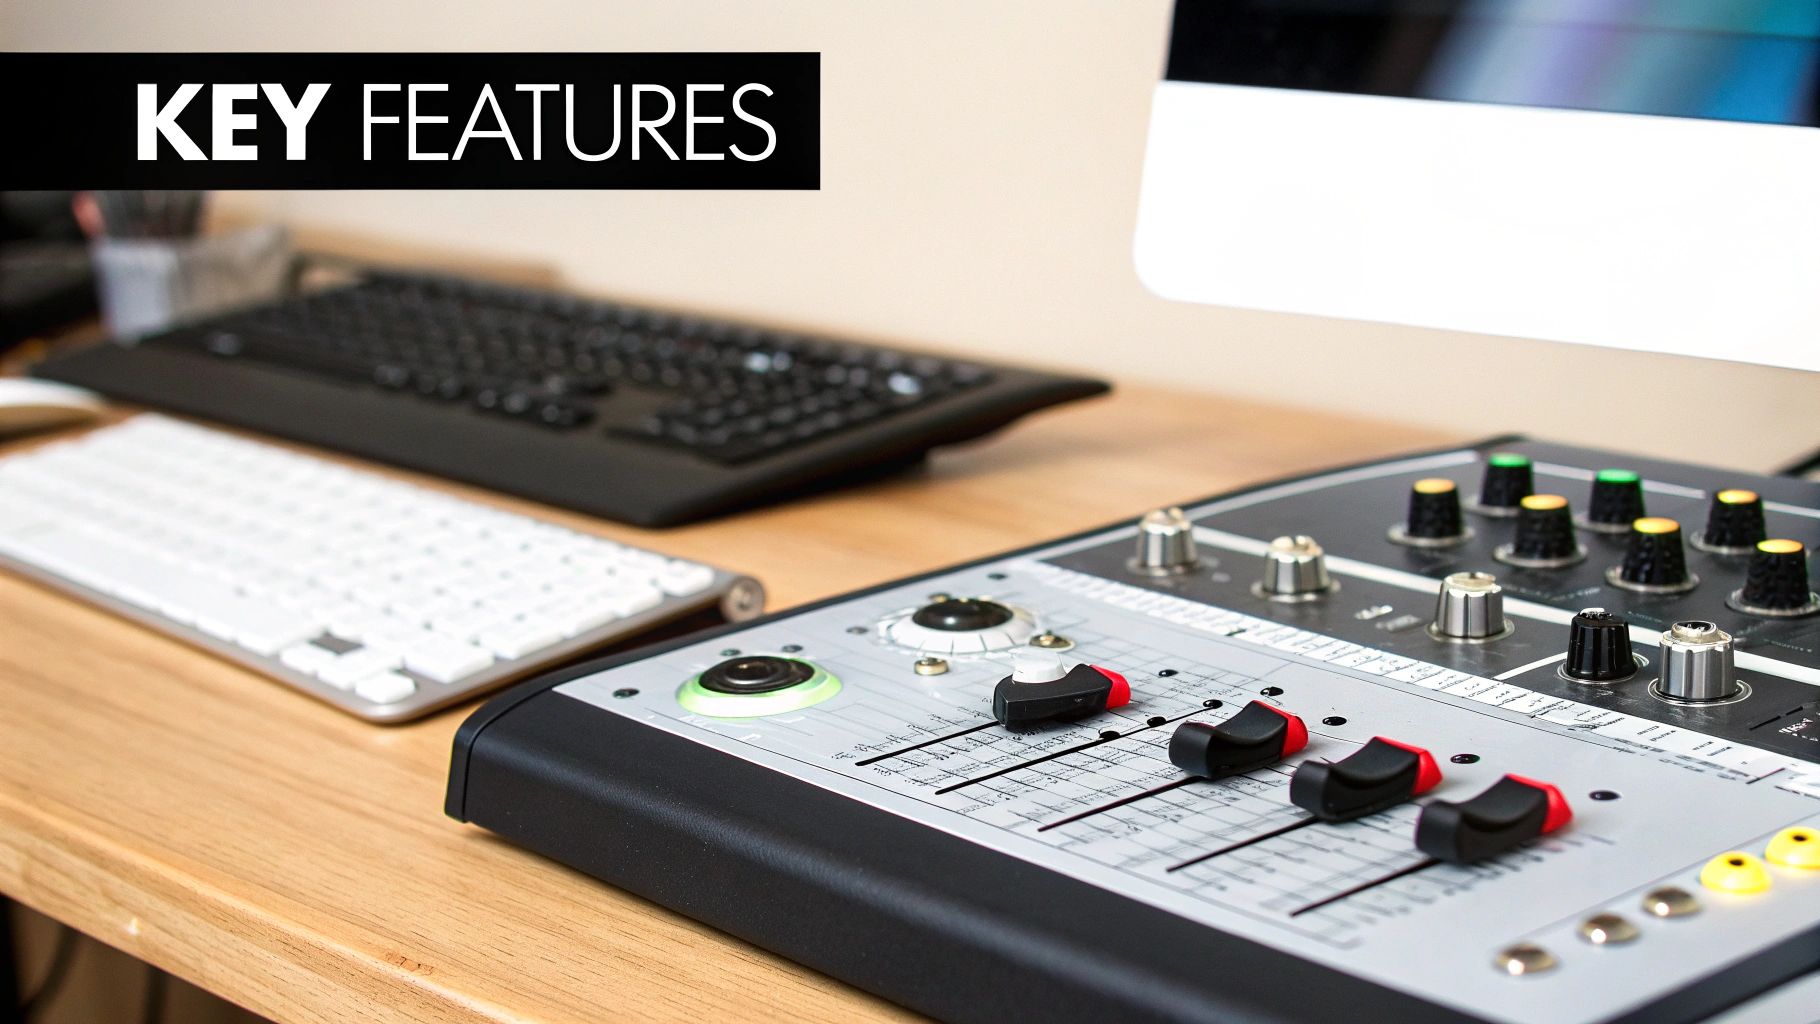
Decoding Key Monitor Specifications
Stepping into the world of studio monitors means coming face-to-face with a wall of technical jargon. Terms like “frequency response,” “driver size,” and “power rating” can feel a bit intimidating, but they’re the keys to understanding how a speaker will actually perform in your space. Let's translate this tech-speak into practical knowledge that will directly impact your music.
Think of a spec sheet not as a complex engineering document, but as a monitor's resume. It tells you its strengths, its weaknesses, and what kind of job it’s really cut out for. Getting your head around these details helps you see past the marketing hype and choose the best studio monitors for home recording based on genuine performance, not just brand recognition.
Driver Size: The Foundation of Your Sound
One of the first specs you'll bump into is driver size. This usually refers to the diameter of the woofer—the larger cone responsible for pushing out all the low and mid-range frequencies. For home studios, the most common sizes you'll see are 5-inch, 6.5-inch, and 8-inch.
This choice is about way more than just "more bass." It's about matching the speaker's physical abilities to your room's acoustic reality. Sure, an 8-inch woofer can reproduce lower bass notes with more authority than a 5-inch one, but that's not always a good thing. In a small, untreated bedroom, all that powerful low-end energy will just bounce around, creating a muddy, boomy mess that completely masks what’s really going on in your mix.
- 5-Inch Woofers: Perfect for small rooms (under 12 square metres). They deliver a tight, focused bass that’s less likely to overwhelm your space.
- 6.5-Inch Woofers: A fantastic all-rounder for small to medium-sized rooms. This is often the sweet spot, offering a great balance of low-end extension and clarity.
- 8-Inch Woofers: Best suited for medium to large rooms (over 18 square metres) that have some acoustic treatment. They deliver that deep, powerful bass that’s essential for genres like EDM, hip-hop, and film scoring.
The tweeter, the smaller driver, handles the high frequencies. Its design (like a dome or ribbon) affects the clarity and spread of the treble, but the woofer size is the most critical decision you'll make in relation to your room.
Two-Way vs. Three-Way Designs
Another key distinction is the monitor's design, which is all about how the audio spectrum gets divided up between the drivers. Most home studio monitors are two-way systems, meaning they have one woofer and one tweeter. A crossover circuit acts like a traffic cop, sending the low and mid frequencies to the woofer and the high frequencies to the tweeter.
A three-way system adds a dedicated mid-range driver into the mix. This clever design lets the woofer focus solely on the deep lows and the tweeter handle only the sparkly highs. Meanwhile, a specialised driver takes care of the critical middle frequencies where vocals, guitars, and snares live.
The big win with a three-way monitor is a more detailed and accurate mid-range. Because one driver isn't trying to juggle bass and vocals at the same time, you get less distortion and a much clearer picture of your mix’s most important elements.
While three-way systems often sound incredible, they are typically larger and more expensive. For most home recording setups, a high-quality two-way monitor is more than enough to get professional-sounding results.
Ported vs. Sealed Cabinets
Finally, you’ll see two main cabinet designs: ported (or bass-reflex) and sealed. A ported monitor has a hole or vent in the cabinet. This design cleverly uses the air pressure from the back of the woofer to reinforce the low-frequency output, making the bass feel deeper and more powerful.
A sealed monitor, on the other hand, has no port. The cabinet is completely airtight, which gives you a tighter, more accurate, and faster bass response. The trade-off is that they typically can't reproduce frequencies quite as low as a similar ported speaker.
Choosing between them often comes down to personal taste and genre. An electronic music producer might love the extended low-end of a ported monitor, while an engineer mixing acoustic folk might prefer the punchy precision of a sealed cabinet. Getting these core specs right moves you from being a confused buyer to an informed producer, ready to pick a tool that will truly elevate your sound.
Matching Your Monitors to Your Room
Choosing the right studio monitors is only half the battle. The other half is making sure they actually work in your space. Your room isn't a passive listener; it actively shapes everything you hear, and its size and acoustic quirks can completely change the sound coming from even the most high-end speakers.
Think of it this way: putting a massive pair of monitors in a small, untreated bedroom is like buying a Ferrari to drive exclusively in city-centre traffic. You’ve got all this incredible power under the hood, but the environment makes it impossible to use properly. The real goal is to find a perfect match where your monitors and your room are working together, not fighting each other.
Bigger Isn't Always Better
It's one of the most common mistakes people make when setting up a home studio: assuming that bigger monitors with larger woofers are automatically better. Sure, an 8-inch woofer can push out deeper bass than a 5-inch one, but all that low-end energy needs room to breathe.
In a small room, those powerful bass waves don't have enough space to fully form before they smack into a wall. Once they do, they bounce back and create a messy pile-up of overlapping frequencies. This causes "standing waves," which make certain bass notes boom unnaturally loud while others seem to vanish entirely. You're left with a muddy, inaccurate low-end that makes mixing decisions a total nightmare.
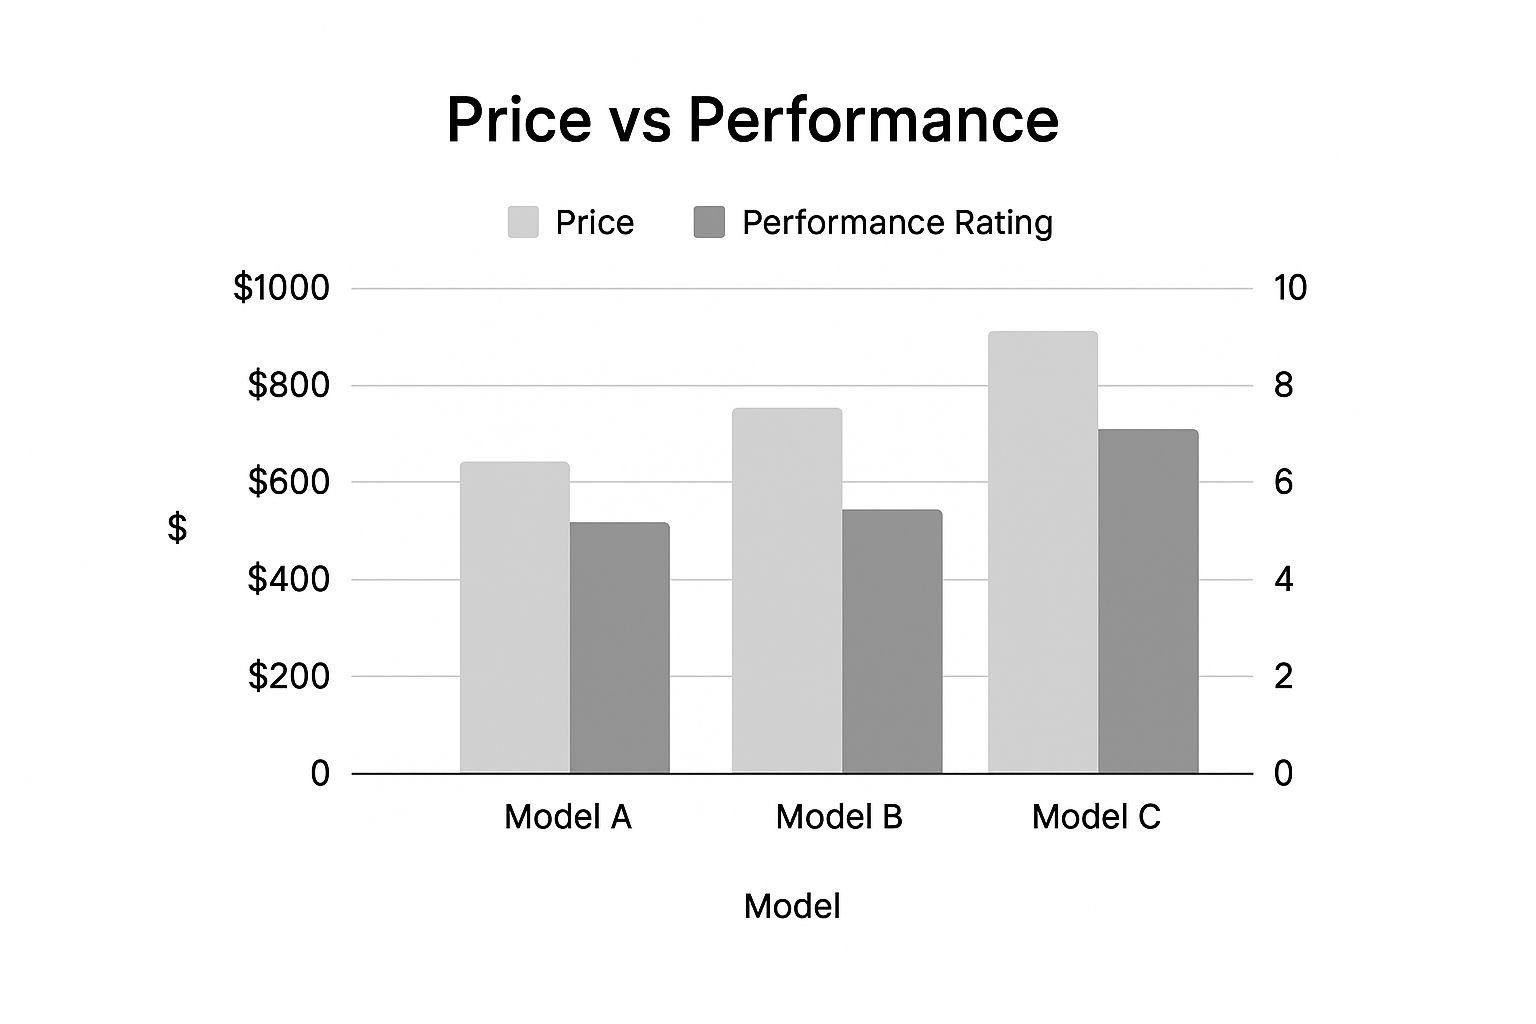
You can see below how price and performance don't always tell the whole story. The best value comes from finding the right tool for the job, not just the most powerful one.
Here's a quick guide to help you match your monitor size to your room, which is a great starting point for avoiding these common acoustic traps.
Monitor Driver Size vs Recommended Room Size
| Woofer Size | Ideal Room Size (Approx.) | Best For Genres |
|---|---|---|
| 3-4 inch | Small rooms, desktops (e.g., 2.5m x 3m) | Podcasts, dialogue editing, simple electronic music, acoustic |
| 5-6 inch | Small to medium rooms (e.g., 3m x 4m) | Rock, pop, folk, most home studio applications |
| 7-8 inch | Medium to large rooms with some treatment (e.g., 4m x 5m+) | Hip-hop, EDM, film scoring, genres requiring deep and accurate bass extension |
This table is just a general guideline, of course. Every room is different, but it highlights the importance of choosing a monitor that won't overwhelm your space with low-frequency energy you can't control.
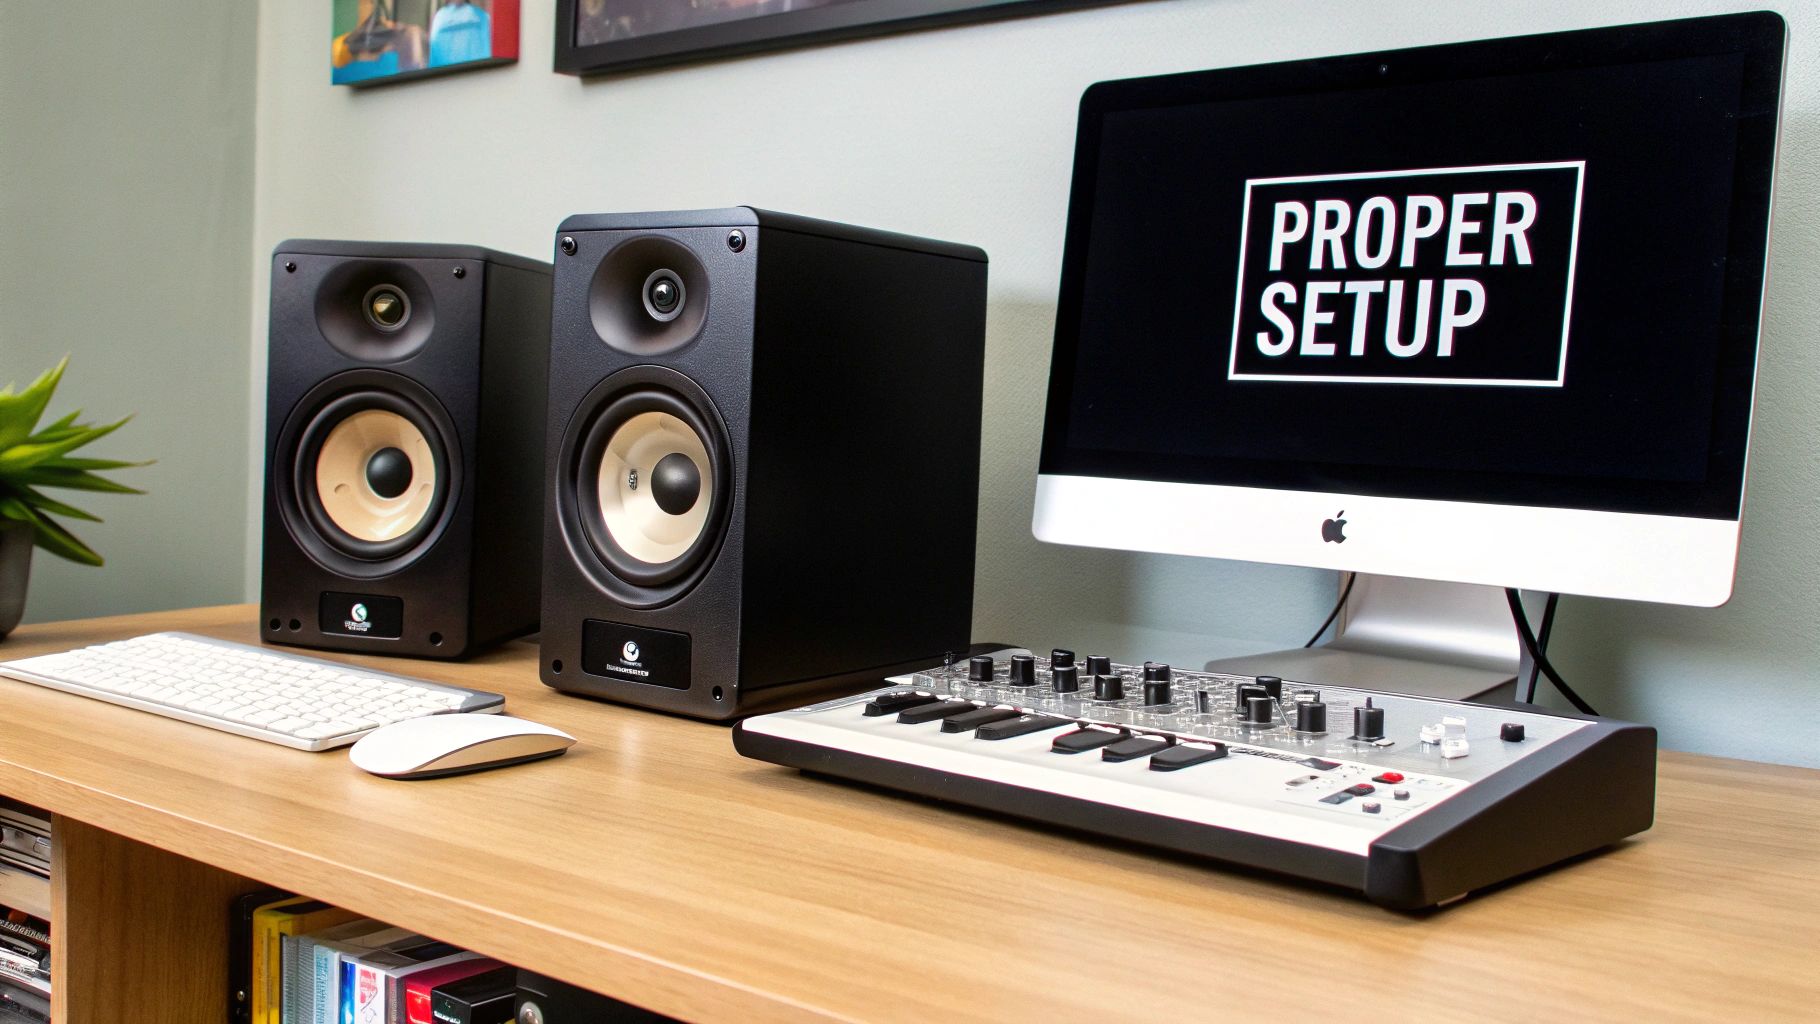
The Equilateral Triangle Setup
Once you've got monitors that are the right size for your room, the next crucial step is placing them correctly. The industry-standard starting point is known as the equilateral triangle, and it's designed to give you the most accurate and focused stereo image possible.
It's simple to set up:
- Position Your Monitors: Place your left and right monitors so the distance between them is the same as the distance from each monitor to your head.
- Aim the Tweeters: Make sure the tweeters (the small drivers) are pointing directly at your ears. High frequencies are very directional, so this is key.
- Form the Triangle: If you drew lines connecting your ears to each speaker, you should have a perfect triangle with three equal sides.
This setup ensures the sound from both speakers hits your ears at precisely the same time. This creates that focused "sweet spot" where you can hear stereo panning, depth, and detail with crystal clarity.
Getting your monitor placement right costs nothing but can dramatically improve your listening accuracy. It’s the highest-return, lowest-cost upgrade you can make to your home studio.
Simple Steps for Acoustic Improvement
You don't need to spend thousands on professional acoustic treatment to hear a massive difference. The aim in a home studio isn't to create a perfectly dead, soundproof chamber—it's just to tame the most distracting reflections.
Even a few simple, budget-friendly moves can go a long way:
- Tame First Reflections: Sound bounces off your side walls and ceiling before it reaches you. Placing acoustic panels (or even thick blankets) at these "first reflection points" absorbs those bounces and cleans up your stereo image.
- Add Bass Traps: To deal with the low-end mud we talked about earlier, stick bass traps in the corners of your room. Corners are where bass energy loves to build up, and trapping it there will tighten up your low-end response.
- Use Everyday Objects: Don't underestimate what you already have! A bookshelf packed with books, a thick rug on a wooden floor, or a plush sofa can all act as fantastic sound diffusers and absorbers.
By thoughtfully matching your monitors to your space and making a few key tweaks, you build a listening environment you can actually trust. For a deeper dive, our guide on room acoustics and speaker placement explained has even more practical tips. It's this foundation of trust that gives you the confidence that what you're hearing is what's really in your mix.
Right, so you’ve got a handle on the basics like driver size and frequency response. Now, let’s get into the nitty-gritty: the practical stuff that can make or break your experience with a new pair of monitors. We're talking connectivity, cool new tech, and of course, how much you should be looking to spend.
Getting these details right is about more than just good sound; it's about making sure your new monitors slide into your workflow without any fuss.
First things first, how are you going to plug them in? Most modern audio interfaces come with balanced outputs, which are absolute lifesavers in home studios buzzing with all sorts of electronic gear. These outputs are specifically designed to cancel out noise and interference. Your goal is to match them with balanced inputs on your monitors.
- XLR and TRS: These are the pro standards for a reason. They create a clean, secure, and balanced connection between your interface and speakers, keeping your audio signal pure from start to finish.
- RCA: You’ll typically find these unbalanced connections on consumer hi-fi gear. While some entry-level monitors include them, they're much more likely to pick up hum from nearby power cords or other electronic noise.
Bottom line? If your audio interface has XLR or TRS outputs, use them. It's a simple choice that guarantees a cleaner signal path right out of the box.
Modern Tech and Taming Your Room
As speaker technology has moved forward, a lot of monitors now come with some serious brains built right in. We’re talking about Digital Signal Processing (DSP). This onboard computer can handle all sorts of tweaks, but its most powerful trick is often room correction.
Monitors with room correction use a special microphone to analyse your room's acoustic gremlins. They listen for all the weird reflections and bass build-ups that plague most home setups and then create a custom EQ curve to counteract them. It's not a complete replacement for proper acoustic treatment, but it's a massive help in getting a more accurate sound. If it’s in your budget, it’s a feature well worth looking for.
Think of room correction DSP as having a little audio engineer inside your speakers, tuning them perfectly for your specific space. It helps smooth out the sonic bumps and dips your room creates, giving you a sound you can actually trust.
Finding the Right Price Point
The studio monitor market is a big place, but it's pretty easy to break down into a few budget tiers. Knowing what to expect at each level helps you match your investment to your goals. You don't want to overspend, but you also don't want to buy something you'll outgrow in six months.
This is especially true here in Australia, where the home recording scene is absolutely thriving. The growing demand from musicians, podcasters, and content creators has seen the local market expand like crazy. This is part of a global trend, with the studio monitor market projected to grow from USD $1.8 billion in 2023 to USD $2.87 billion by 2031. If you're curious about the numbers, you can dig into the full research on studio monitor speaker market trends.
Let's break down what your money gets you:
- Entry-Level (Under $500 per pair): Perfect for anyone just starting out. Monitors in this price range offer decent clarity and are a huge leap from standard computer or hi-fi speakers. The build quality is usually solid, but you might find the bass isn't super defined, and they probably won't reveal the absolute finest details in your mix.
- Prosumer ($500 - $1,500 per pair): This is the sweet spot for most serious home studios. Here, you get much better build quality, a more accurate frequency response, and you’ll start seeing features like DSP room correction. These monitors provide the kind of detail you need to produce professional-sounding tracks.
- Professional (Over $1,500 per pair): Welcome to the top tier. At this level, you're paying for uncompromising accuracy. We're talking premium components and sophisticated designs that deliver incredible sonic imaging and depth. These are for dedicated professionals who need to hear every last detail, no exceptions.
Your Studio Monitor Questions, Answered
Diving into the world of home recording gear always kicks up a few questions. To help you nail your final decision with confidence, here are some straight answers to the most common queries we get about choosing and using studio monitors.
Do I Really Need a Subwoofer for My Home Studio?
For most home studios, especially in smaller or untreated rooms, the answer is usually no. In fact, a subwoofer can often do more harm than good by creating an overwhelming amount of bass that clouds your mix and tricks you into making poor EQ choices that just don't work on other systems.
A solid pair of 5-inch or 6.5-inch monitors will give you plenty of accurate low-end to work with for most music genres. You'd really only consider a sub if you're in a professionally treated room working on seriously bass-heavy material, like film scores or specific types of electronic music. Your money is almost always better spent on better quality monitors and some basic acoustic treatment first.
How Loud Should I Be Mixing?
You'll want to mix at a comfortable, conversational volume—think somewhere around 75-85 dB SPL. It's tempting to crank it up, but mixing too loud will tire your ears out fast. More importantly, it exaggerates all the acoustic problems in an untreated room, especially in the low end.
Working at a lower, consistent volume gives you a much more accurate picture of your sound and lets you mix for longer without your ears playing tricks on you. A simple SPL meter app on your phone is a great way to check your levels and keep them consistent.
Ever heard of the "Fletcher-Munson" curves? They show how our ears perceive different frequencies at different volumes. Mixing at a steady, moderate level keeps your perception of the frequency balance stable, which is the secret to getting mixes that sound great everywhere.
Can I Get Away With Using Just One Monitor?
While you absolutely need a stereo pair for the main job of mixing, checking your mix in mono on a single speaker is a classic pro move. It’s a dead-simple trick that instantly reveals any phase issues between your stereo elements that you might have missed otherwise. It’s the key to making sure your mix still packs a punch on mono systems, like a club PA or a little Bluetooth speaker.
Some audio pros use dedicated field recorders for this purpose, as we covered in our review of the DR-680MKII portable recorder, but flipping to mono on a single studio monitor works just as well.
Is the "Break-In" Period for New Monitors a Real Thing?
Yes, it is. The "break-in" or "burn-in" period is the time it takes for the mechanical parts of a new speaker, like the woofer's surround, to loosen up and start performing exactly as the designers intended. Most manufacturers suggest playing a variety of music through new monitors for anywhere from 10 to 40 hours at a moderate volume.
The sonic changes can be subtle, but this process lets the monitors settle into their sweet spot. Just as importantly, it gives your ears time to get used to their specific sound signature.
At Sounds Easy, our goal is to help you find the perfect audio gear to bring your creative vision to life. Check out our huge range of studio monitors and let our expert advice guide you to a setup you can truly trust. Visit us online at https://soundseasy.com.au to find your sound.
Leave a comment
Comments will be approved before showing up.
PayPal Pay Later Messaging
Step 1: Choose message placement
Click the button below and then hover over your page to select a placement.