Your Cart is Empty
Your Guide to Setting Up a Recording Studio in Australia


Right then, before you even think about buying a single microphone or sticking up a piece of acoustic foam, the most important work you'll do is on paper. A solid, well-thought-out plan is the bedrock of any good studio, and it'll save you a world of time, money, and headaches down the track. This is where you square up your dreams with what's actually practical.
Planning Your Ideal Recording Space
The very first question you need to ask yourself is a big one: what is this studio for? Your answer here will shape every single decision that follows.
- Personal Project Studio: Are you a songwriter knocking out demos, a podcaster, or an electronic music producer? If so, you'll be aiming for a streamlined setup that’s perfectly dialled into your specific workflow.
- Commercial Facility: Planning on recording bands, voice-over artists, or producing for paying clients? This path demands a much more versatile and robust equipment list, serious acoustic isolation, and probably a larger space to boot.
Define Your Studio's Purpose and Budget
Naturally, your studio's function is tied directly to your budget. A personal project space can come together for a few thousand dollars, but a commercial setup can easily soar into the tens of thousands. Be brutally honest with yourself about your financial limits from day one. I always recommend firing up a spreadsheet and listing out everything – gear, acoustic treatment, software, and even the little things like cables and stands. They add up fast!
The music scene here in Australia is buzzing, which opens up some fantastic opportunities for both hobbyists and pros. Australia’s music market, valued at USD 245.5 million in 2024, is tipped to hit a massive USD 505.3 million by 2033. This boom is largely thanks to digital streaming, which has made it easier for independent artists to get heard and, in turn, has ramped up the demand for quality, accessible recording spaces.
Here's a classic rookie error: blowing the entire budget on flashy gear and completely forgetting about the room itself. An expensive microphone in a terrible-sounding room will always give you a terrible-sounding recording. Your priority should always be the space and its treatment first.
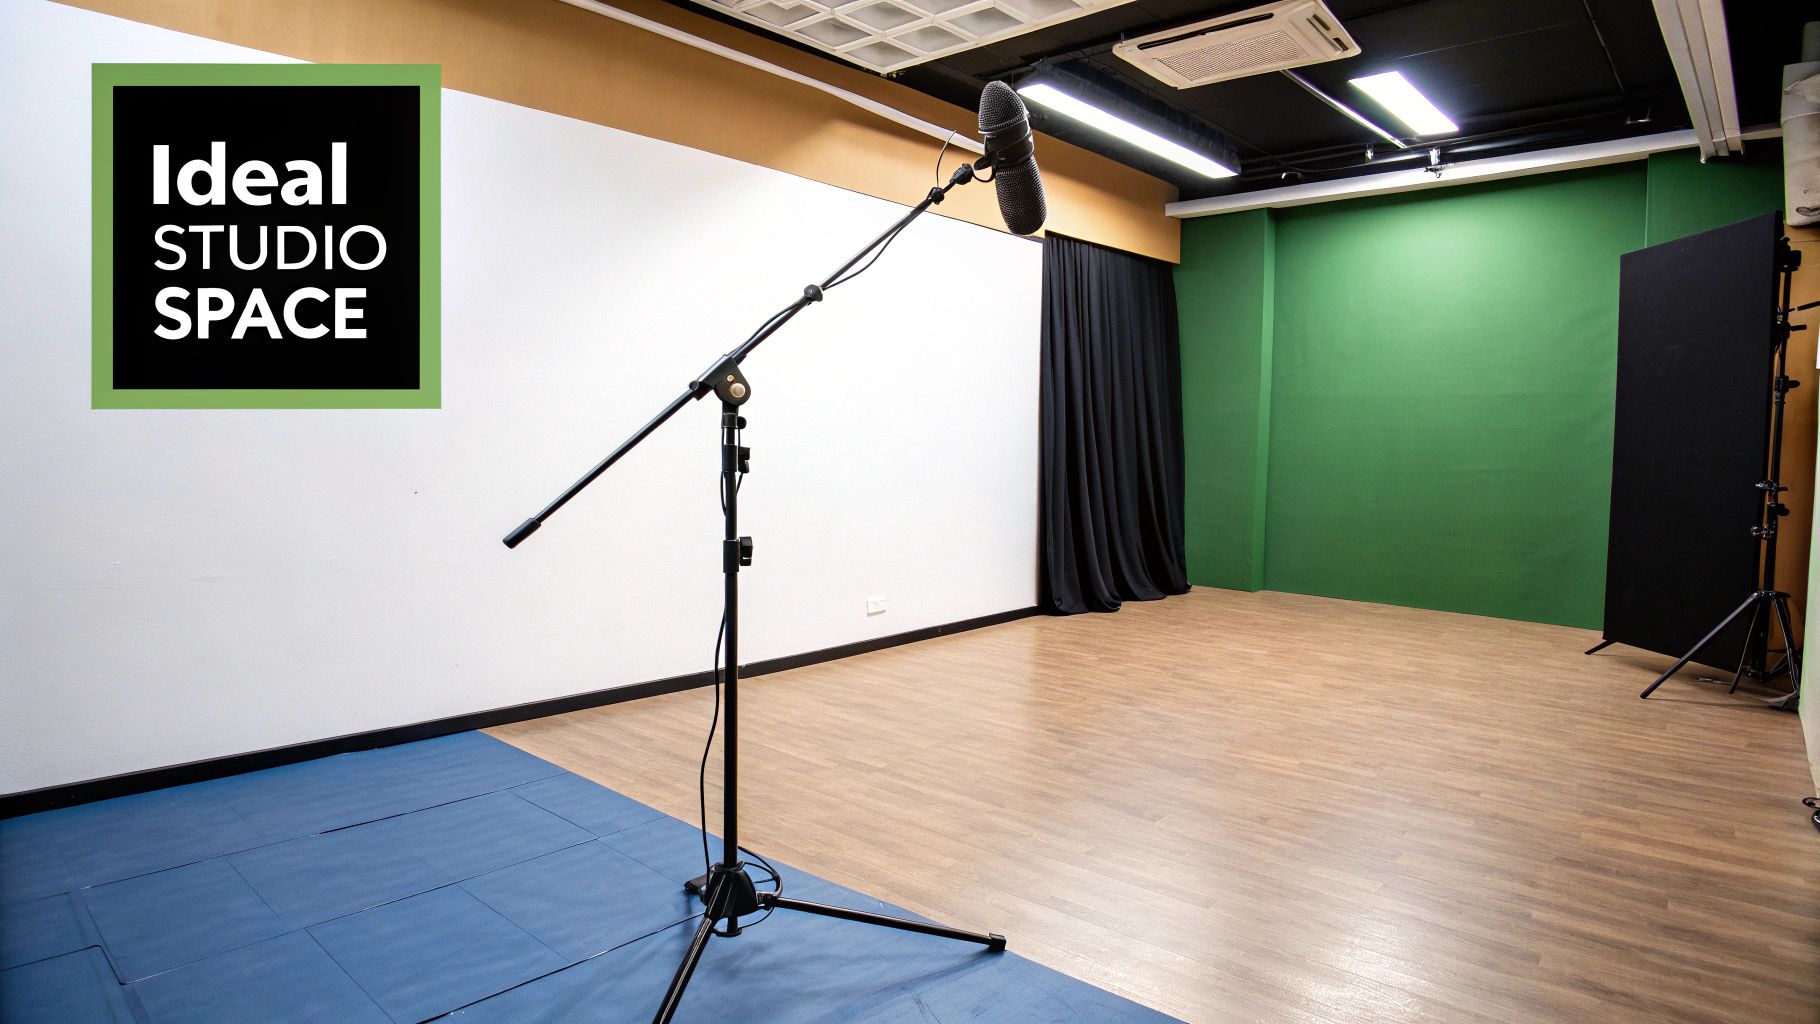
Scouting the Perfect Location
Once you've got a clear purpose and budget, it's time to hunt for the right room. Whether it's a spare bedroom, a garage, or a dedicated commercial space, there are a few physical characteristics that are simply non-negotiable.
First, listen for noise from the outside world. Stand in the potential space at different times of the day. Can you hear traffic? Barking dogs? The neighbours arguing? These sounds will bleed into your recordings and are a nightmare to fix later. Proper soundproofing is a massive, often expensive, job.
Next, look at the room's dimensions. You want to avoid perfect squares or rooms where the length is an exact multiple of the width or height. Believe it or not, these "perfect" dimensions create acoustic chaos called standing waves. These are resonant frequencies that build up and make your bass response completely uneven and unreliable. An oddly shaped room with non-parallel walls is actually a huge acoustic win.
If your vision involves major structural changes like building new walls or serious soundproofing, you'll need to get familiar with local council regulations. Before you pick up a hammer, especially if you're in South Australia, make sure you understand the building permit requirements in Adelaide. A bit of research now can save you from some major headaches later on.
Solving Your Room Acoustics
So, you've picked out the perfect space. Now comes the part that will make or break your sound quality: the room acoustics. I can't stress this enough—you could have the most expensive, high-end gear in the world, but if your room sounds bad, your recordings will always sound amateur. Getting this right isn't about throwing money at the problem; it’s about smart, targeted solutions.
First up, let's clear the air on a common point of confusion: soundproofing versus acoustic treatment. Soundproofing is all about isolation. It’s about stopping your neighbour's dog from getting into your vocal takes, and stopping your drum tracking from annoying your neighbours. Think thick walls, double-glazed windows, and sealed doors.
Acoustic treatment, however, is about controlling how sound behaves inside the room. For most home setups, you'll probably want a bit of both, but acoustic treatment is where you'll hear the most dramatic improvements in your mixes and recordings.
Identifying Common Acoustic Problems
Before you can start fixing things, you need to know what you're listening for. Go into your untreated room and give a loud, sharp clap. Hear that zingy, metallic ringing sound bouncing between the walls? That's flutter echo, and it's the classic sign of sound waves ricocheting between two parallel, reflective surfaces, like bare plasterboard walls.
Another sneaky culprit is the standing wave. These happen when a sound wave's length fits perfectly into one of your room's dimensions (length, width, or height). This creates spots in the room where specific bass frequencies get super loud, and other spots where they almost disappear entirely. It’s the reason your mix can sound punchy and full at your desk, but then sound thin and weak when you play it in your car.
The goal here isn't to create a completely "dead" space with zero reflections. A little natural room sound is a good thing! The trick is to tame those reflections so they don't blur your stereo image or turn your low end into a muddy mess.
Strategic Placement of Acoustic Treatment
Proper acoustic treatment is less about covering every inch of your walls with foam and more like a surgical strike on the problem areas. Each piece has a very specific job to do.
To get a clearer picture of how these treatments work together, here’s a quick breakdown of the common solutions, what they do, and where they'll make the biggest impact.
Acoustic Treatment Solutions and Their Purpose
| Treatment Type | Primary Function | Best Placement Locations | Target Frequencies |
|---|---|---|---|
| Bass Traps | Absorbs low-frequency energy | All room corners (floor-to-ceiling) | Low Frequencies (below 300 Hz) |
| Absorption Panels | Tames mid & high-frequency reflections | First reflection points (side walls, ceiling) | Mid to High Frequencies |
| Diffusers | Scatters sound energy to prevent echo | Back wall, sometimes the ceiling | Mid to High Frequencies |
Getting these pieces in the right place is what separates a professional-sounding room from an amateur one. Bass traps are always your first priority, followed closely by treating those first reflection points.
-
Bass Traps: These are your heavy lifters. Low-frequency sound is powerful and loves to build up in the corners of a room. Sticking thick, porous absorbers—bass traps—in every corner you can is the number one thing you can do to get a tight, accurate bass response.
-
Absorption Panels: These are for killing early reflections. Your "first reflection points" are the spots on your side walls, ceiling, and the wall behind your speakers where sound bounces on its way to your ears. Treating these spots with absorption panels will give you a crisp, clear stereo image, letting you hear every detail in your mix.
-
Diffusers: Unlike absorbers that just soak up sound, diffusers scatter it in different directions. Putting diffusers on the back wall of your studio breaks up standing waves and adds a nice sense of space and life to the room without making it sound completely dead.
Below is a great example of how absorption panels can be used to treat a studio wall and manage those critical reflections.
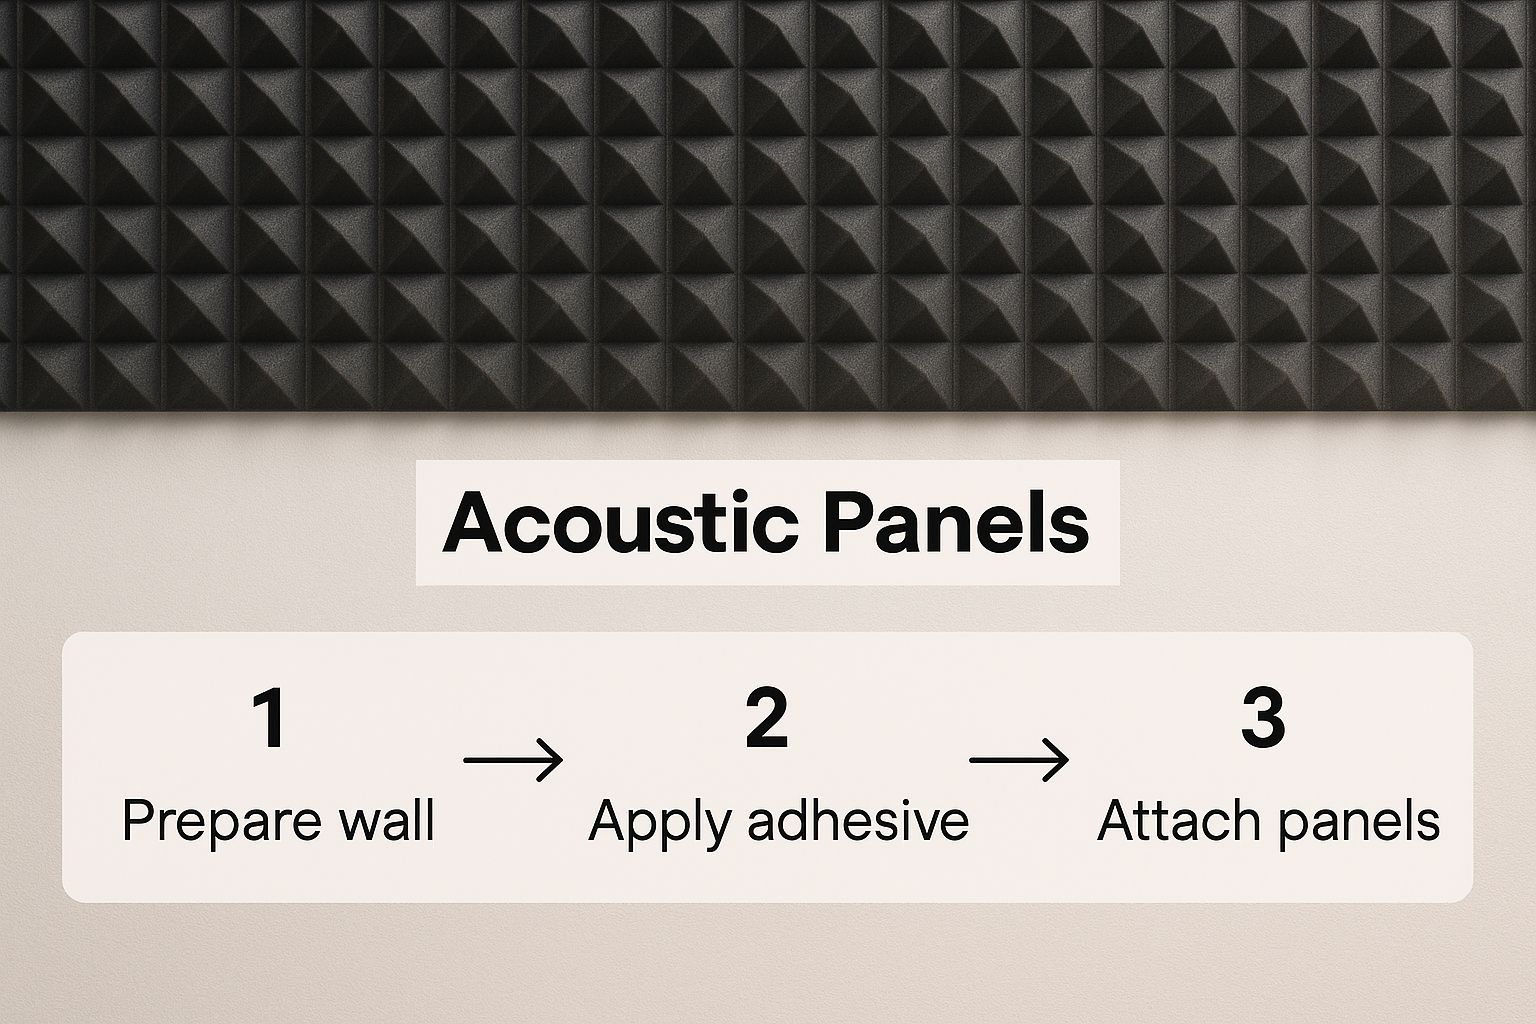
This image shows how a few well-placed panels can transform a reflective surface into a controlled acoustic environment, which is absolutely fundamental to getting your studio set up right.
Practical DIY Solutions and Placement Tips
You really don't need a massive budget to hear a huge difference. While professional panels from brands like Primacoustic or Universal Acoustics are excellent, you can build your own highly effective broadband absorbers with some dense rock wool, a simple timber frame, and some breathable fabric. Honestly, they often work better than the cheap foam you see online, especially for lower frequencies.
Here's a classic trick for finding your first reflection points: the "mirror trick." Sit down in your mixing chair and have a friend slide a small mirror along the left and right walls. Any spot where you can see one of your studio monitors in the mirror is a first reflection point. That’s where you need an absorption panel. Don't forget to do the same for the ceiling area between you and your speakers!
If you want to go deeper into the science behind this, check out this fantastic guide to room acoustics and speaker placement explained. Taking the time to understand these principles is a real game-changer for anyone serious about audio.
Selecting Your Essential Studio Gear
Alright, once you’ve tamed the acoustics of your room, we get to the really fun part: choosing your gear. This is where you start building the engine of your studio.
The goal here isn't to buy the most expensive equipment you can find. It’s about picking the right tools for your specific needs to create a solid, reliable signal chain from the moment you hit record to the final playback.
It’s easy to get lost in a sea of technical jargon and endless options. To keep things simple, let's focus on the five core pieces that form the foundation of any modern recording space. These are your computer, your Digital Audio Workstation (DAW), an audio interface, microphones, and of course, your studio monitors. Getting these five things right is absolutely crucial.
Your Computer: The Studio's Brain
Think of your computer as the central nervous system for your entire setup. You don’t need a supercomputer built for intergalactic travel, but audio production has its own unique demands that set it apart from gaming or general office work.
You’ll want to pay close attention to a few key specs:
- Processor (CPU): This is a big one. A faster, multi-core processor (like an Intel i7/i9 or Apple's M-series chips) is going to let you run more plugins and virtual instruments without your system grinding to a halt.
- RAM (Memory): Consider 16GB of RAM the absolute minimum. Honestly, 32GB is the real sweet spot for handling bigger sessions with tons of tracks and hefty sample libraries.
- Storage (SSD): A Solid State Drive (SSD) is non-negotiable these days. It makes a massive difference in loading times for your operating system, DAW, and audio samples, which means less waiting and more creating.
The gear market is always moving forward. In fact, Australia's professional audio equipment market is projected to jump from USD 1.9 billion in 2025 to USD 3.4 billion by 2031. This boom is fuelled by new tech like AI-powered audio tools and cloud collaboration, so the gear you choose today is part of an exciting, growing industry.
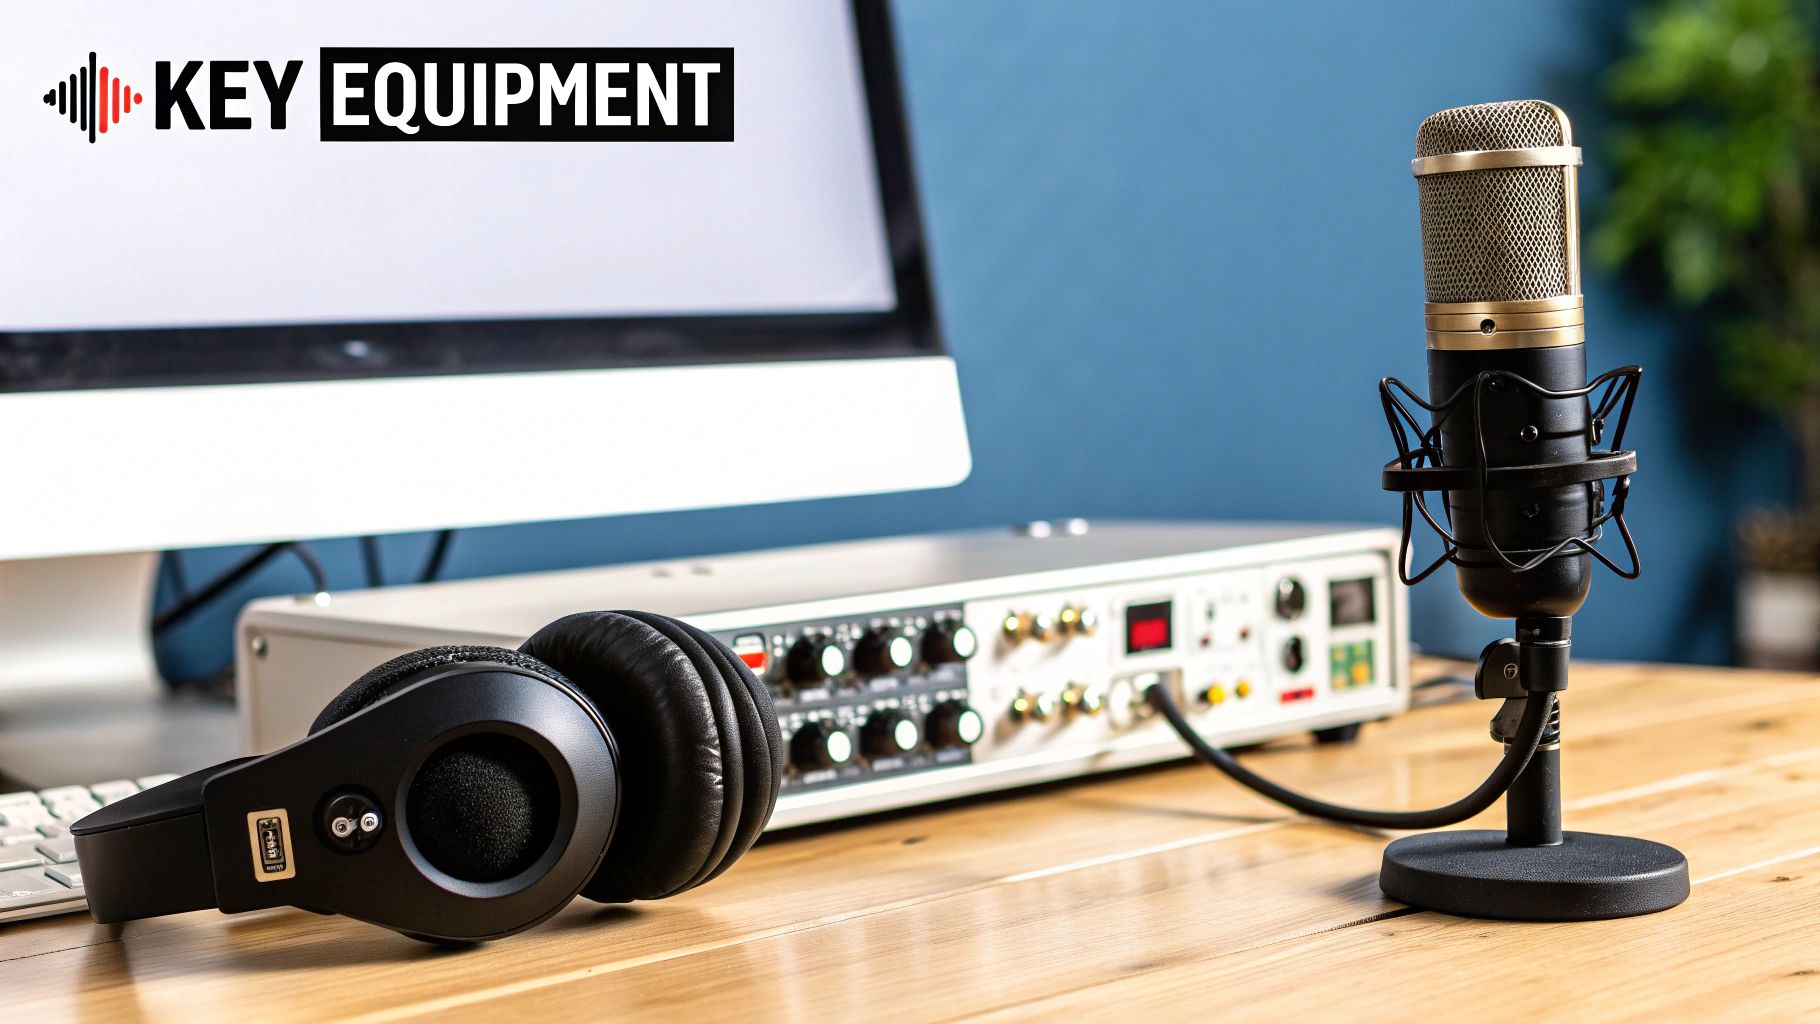
The DAW and Audio Interface: The Heart of Your Workflow
Your Digital Audio Workstation (DAW) is the software where all the magic happens—recording, editing, mixing, and mastering. The "best" one is completely subjective and really comes down to what feels right for your workflow. Pro Tools, for example, is the long-standing industry standard for tracking bands in big studios, while a program like Ableton Live is a favourite among electronic producers for its creative looping and performance features.
Your audio interface is the physical hardware that connects the analogue world (your microphones and guitars) to the digital world of your computer. It translates incoming audio into data your computer can process, and then converts it back for playback through your speakers.
When picking an interface, the first question to ask is: how many things do I need to record at the same time? A solo artist might get by perfectly with two inputs, but if you're planning on recording a full drum kit, you’ll need at least eight. The quality of the preamps inside the interface is also a huge factor, as these are what boost the weak signal from your microphone to a usable level.
For a deeper dive, check out our guide to choosing the right audio interface.
A common mistake is buying an interface with way more inputs than you'll ever actually use. Start with what you need right now. You can always upgrade later if your projects get bigger. A quality two-channel interface is a much better investment than a cheap eight-channel one.
Microphones and Monitors: Your Ears and Voice
Finally, we get to the transducers—the gear that turns sound into electricity (microphones) and electricity back into sound (monitors).
There are three main types of microphones you'll come across:
- Condenser Mics: These are highly sensitive and capture a lot of detail, making them perfect for vocals, acoustic guitars, and piano. They need "phantom power" from your audio interface to work.
- Dynamic Mics: These are tough, workhorse mics that can handle high volumes really well. They are the go-to choice for miking up guitar amps, snare drums, and loud vocals.
- Ribbon Mics: Known for their warm, vintage sound, ribbon mics can be incredible on electric guitars and brass instruments. They are, however, typically more fragile than other types.
Your studio monitors are arguably the single most important purchase you'll make. Unlike hi-fi speakers designed to make music sound "good," studio monitors are designed to sound accurate. Their job is to show you every single flaw in your mix so you can fix it. Mixing on bad speakers is like trying to paint in a room with coloured lights—you'll have no idea what the true colours are until you take it somewhere else.
Crafting a Smart Studio Workspace
You’ve treated your room and picked out your gear. Now for the fun part: arranging it all into a space that feels efficient, comfortable, and genuinely creative. How you lay out your studio directly impacts your workflow and—believe it or not—your physical health during those marathon sessions. A smart layout simply removes the friction between an idea and the execution.
The absolute cornerstone of a great mixing position is the equilateral triangle, often just called the "mixing triangle." This isn't just some abstract theory; it's a simple geometric rule that is absolutely key to hearing an accurate stereo image.
Picture a triangle with three points: your head and your two studio monitors. For the magic to happen, the distance between your two speakers needs to be the same as the distance from each speaker to your ears. This forms that perfect equilateral triangle. Your head is the final point, and you'll want to angle the monitors inward so they're pointing right at your ears.
Laying an Ergonomic Foundation
Long hours tracking or mixing will take a serious toll on your body if your setup isn’t working with you. Think of your chair and desk as the foundation of your studio's comfort.
It all starts with a quality, adjustable chair that gives you proper lumbar support. Your feet should be flat on the floor, with your knees bent at about a 90-degree angle. Your desk height is just as crucial. You want your keyboard, mouse, and control surfaces positioned so your arms are parallel to the floor, which helps prevent strain on your wrists and shoulders.
A classic mistake is placing monitors too far apart or too close together. If the stereo image is too wide, you'll get a weird "hole" in the middle. Too narrow, and everything just sounds mono. The equilateral triangle is your foolproof guide here.
To really dial in comfort and adaptability for long days, it's worth looking into height adjustable workbenches. The ability to switch between sitting and standing is a game-changer for fighting off fatigue and staying locked in.
Taming the Cable Chaos
Nothing kills the creative vibe of a studio faster than a chaotic nest of cables. It’s not just an eyesore; messy wiring is a tripping hazard and can even introduce unwanted noise into your signal chain if power and audio cables are running parallel.
Here are a few practical tips to get that wiring under control:
- Plan your routes: Before you plug anything in, think about the cleanest, shortest path for each cable.
- Use cable ties or sleeves: Grouping related cables together with velcro ties or flexible sleeves makes a world of difference. It looks tidier and makes troubleshooting a breeze.
- Label everything: This is a genuine lifesaver. Put a label on both ends of every single cable. You’ll thank yourself a year from now when you need to unplug something specific.
- Separate power and audio: Whenever you can, avoid running power cables right alongside your audio cables for long stretches. This is the best way to minimise the risk of electrical hum and interference.
Smart Organisation for Quick Access
Finally, let's think about making your gear work for you. A well-organised studio means the tool you need is always within arm's reach, keeping you in that creative flow state.
Simple things like wall hangers for guitars and basses can free up a surprising amount of floor space while keeping your instruments ready to go. A dedicated microphone cabinet or even a simple, labelled drawer system can make finding the right mic for the job quick and painless. By thoughtfully arranging your workspace, you’re building a studio that doesn't just look professional, but feels intuitive and inspiring every time you walk in.
Connecting and Configuring Your Workflow
Alright, with your room treated and your gear in place, it’s time for the fun part: bringing it all to life. This is where you physically connect everything and get your workflow dialled in, ensuring that when an idea hits, you’re ready to capture it without any technical headaches. This initial setup is all about creating a clean signal path—the journey your audio takes from the microphone all the way to your speakers.
Before you plug anything in, though, a quick word on power. All this gear—monitors, computers, preamps—draws a fair bit of electricity, and your standard home circuits might not be up to the task. To avoid issues like ground hum or, worse, damaging your equipment, it might be worth looking into professional electrical switchboard repairs and upgrades. Getting this sorted now saves a world of pain later.
Making the Physical Connections
Your audio interface is the heart of your studio, the central hub that directs all the audio traffic in and out of your computer. Everything plugs into this box.
Start with your microphones and instruments. Grab some quality XLR cables for your mics and quarter-inch jack cables for things like guitars or synths. Plug them into the inputs on your interface. If you're using a condenser microphone, don't forget to switch on the phantom power, usually marked as +48V.
Next up are your studio monitors. These connect to the main outputs on the back of your interface. It's really important to use balanced cables here—either XLR or TRS. Balanced cables are designed to cancel out unwanted electrical noise and interference, giving you a crystal-clear signal for monitoring your audio.
I can't stress this enough: don't cheap out on your monitor cables. Using unbalanced cables is a classic rookie mistake that can introduce a nasty hum or buzz into your playback. It makes accurate mixing impossible. Spend a few extra dollars on proper balanced cables; it's a small price to pay for a clean signal.
Configuring Your Software and DAW
With everything physically wired up, you need to tell your Digital Audio Workstation (DAW) how to talk to all this new hardware. Dive into your DAW's preferences or settings menu and select your audio interface as the main audio device.
Once you’ve done that, it's time to set up your inputs and outputs (I/O). Your DAW should automatically see all the available connections on your interface. Now you can assign them to tracks in your session. For instance, you could map "Input 1" to your vocal track and "Input 2" to your acoustic guitar, making it easy to record both at the same time.
Setting Levels and Managing Latency
Getting your hardware and software communicating is one thing, but setting a good recording level is a skill in itself. The goal is to capture a signal that’s loud enough to be well above any background noise but still has plenty of headroom to avoid digital clipping.
A solid rule of thumb is to aim for your signal to average around -18 dBFS on the meters inside your DAW. This leaves you plenty of space for the louder parts of a performance to breathe without hitting that dreaded red light. Once you clip a signal on the way in, there’s no going back.
You'll also run into something called latency—that tiny delay between when you play a note and when you hear it back in your headphones. You can manage this by adjusting the buffer size in your DAW's settings.
- Low Buffer Size (e.g., 64 or 128 samples): This is what you want for recording. It minimises latency, making everything feel tight and responsive. The trade-off is that it's more demanding on your computer's CPU.
- High Buffer Size (e.g., 1024 or 2048 samples): Switch to this when you're mixing. It introduces more latency (which doesn't matter for playback) but gives your CPU a break, so you can load up on plugins and effects without your session grinding to a halt.
Setting up a studio in Australia means you're joining a seriously healthy local scene. In 2024, the Aussie recorded music industry celebrated its sixth consecutive year of growth, with sales jumping 6.1% to $717 million. The big driver is digital, with subscription streaming now accounting for a massive 71% of the total market, which really shows how vital it is for modern studios to be geared for digital production.
Lastly, get your file management sorted from day one. Seriously, it will save you so many headaches. For every project, create a main folder and then subfolders inside for audio files, project files, bounces, and backups. A tidy digital space is just as important as a tidy physical one. It’s also the perfect jumping-off point for shaping your sound. If you’re ready to start mixing, check out our guide on how to use EQ to get a handle on one of the most fundamental tools.
Common Questions About Studio Setups
Jumping into the world of studio setups always kicks up a few questions. It's totally normal. Let's walk through some of the most common ones I hear and get you some clear, straightforward answers to get you started on the right foot.
One of the first hurdles is always software. People often wonder if they need to drop a small fortune on a Digital Audio Workstation (DAW) just to get professional-sounding results.
The short answer? Not at all. While industry workhorses like Pro Tools definitely have their place in big studios, the free options out there are seriously powerful. Many chart-topping tracks have started life in programs like GarageBand (for Mac users) or Audacity (for everyone). The best DAW isn't the one with the biggest price tag; it's the one you feel most comfortable creating with.
Can I Really Treat a Room on a Tight Budget?
Absolutely, and this is a big one. Effective acoustic treatment doesn't have to drain your bank account. You can forget the myth that you need to plaster every wall in expensive, store-bought foam.
DIY acoustic panels are a brilliant, budget-friendly solution. By building some simple timber frames and filling them with high-density rock wool, you can create absorbers that often outperform the cheap foam you see online, especially when it comes to taming those tricky low frequencies. For a few hundred dollars and a weekend of your time, you can make a massive improvement to your room's sound.
A classic rookie mistake is just focusing on absorption. A room that's too "dead" can sound really unnatural and lifeless. Your goal is to control the sound, not eliminate it completely. Even just hanging some thick blankets or duvets on the walls can make a noticeable difference in a pinch.
How Much Does a Decent Starter Microphone Cost?
This is another area where you can get incredible value without needing to remortgage your house. You don't need a $2,000 vintage microphone to capture great recordings. It's just not necessary when you're starting out.
You can find some fantastic, versatile condenser microphones for under $500. Brands like Rode, Audio-Technica, and AKG all offer workhorse mics in this price range that can handle anything from vocals to acoustic guitars with brilliant clarity and detail. Remember, a quality mic in a well-treated room will always sound better than a ridiculously expensive one in a bad space.
Do I Need Studio Monitors Right Away?
This one’s a bit tricky. While you can technically start mixing on headphones, it’s a habit that can lead you astray pretty quickly. Mixing only on headphones often gives you a warped sense of stereo width and an inaccurate picture of what's happening in the low end.
Investing in a pair of entry-level studio monitors is one of the smartest first moves you can make. They're designed for one thing: accuracy. They'll show you the flaws in your mix that regular hi-fi speakers or headphones are designed to hide. Even a small, affordable pair will give you a much more honest representation of your sound, leading to mixes that translate well no matter where you listen to them.
- Software: Start with a free DAW like GarageBand or Audacity. Get comfortable first, then decide if you need to upgrade.
- Acoustics: Your first priority should be DIY panels and putting bass traps in the corners of your room.
- Microphones: Look for a solid condenser mic in that $200-$500 sweet spot. It'll be a workhorse for years.
- Monitoring: A pair of entry-level studio monitors is a much better long-term investment than just sticking with headphones.
By focusing your budget on the things that genuinely make the biggest sonic difference—acoustic treatment and accurate monitoring—you'll be well on your way to building a home studio that's both capable and effective.
At Sounds Easy, we're here to help you build the studio of your dreams, no matter the size or budget. From essential gear to expert advice, explore our huge range of professional audio equipment at https://soundseasy.com.au.
Leave a comment
Comments will be approved before showing up.
PayPal Pay Later Messaging
Step 1: Choose message placement
Click the button below and then hover over your page to select a placement.